A framed mirror built to fit a specific wall or space looks more considered than a standard off-the-shelf piece and costs significantly less than a custom-ordered unit. The project requires basic woodworking tools, a few hours, and the right mirror glass.
Advanced Window & Glass Repair offers custom cut glass services across Northern Virginia, DC, and Maryland. Mirror glass is supplied to exact dimensions for DIY and professional installations. This guide covers every step from choosing the right glass to hanging the finished mirror safely.
Choosing Mirror Size, Shape, and Glass Type
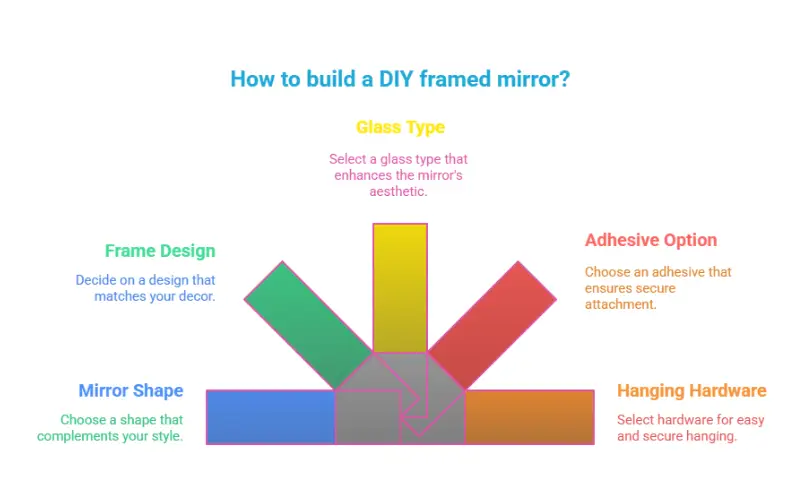
The mirror size should be proportional to the wall it occupies and to the furniture below it. A general rule is that the mirror should be two thirds to three quarters the width of the furniture piece it sits above. This applies whether that is a console table, vanity, or sideboard. A mirror that is significantly narrower than the furniture beneath it looks disconnected; one that is wider creates visual imbalance.
Mirror glass comes in several thicknesses. For frames up to 600mm by 900mm, 4mm mirror glass is sufficient. Larger mirrors benefit from 6mm glass, which is heavier but less prone to flexing and distortion when hung. Mirrors above 1200mm in either dimension should use 6mm glass as a minimum.
Standard mirror glass has a silver or aluminium backing sealed with a copper layer and protective paint. Low-copper mirror glass is available for high-humidity applications. It is worth specifying for bathroom mirrors near shower enclosures where standard backing may fail over time. The backing on standard mirror glass is vulnerable to moisture intrusion at the edges. This causes the black edge corrosion that appears as dark spots around the perimeter of old bathroom mirrors. For glass table tops and custom glass shapes cut to specific dimensions, the same glass-cutting service that produces table top glass applies to mirror glass.
Tools and Materials You Need
Gathering everything before starting avoids stopping mid-project to source missing items.
For the frame:
- Timber moulding or flat board stock (MDF, pine, or hardwood)
- Mitre saw or mitre box and hand saw for 45-degree corner cuts
- Wood glue and corner clamps
- Sandpaper in 80 grit, 120 grit, and 180 grit
- Primer, paint, or stain matching the intended finish
- Brad nailer or finishing nails and hammer
For the mirror mounting:
- Mirror adhesive or mirror clips (see below for selection guidance)
- Silicone sealant for edge sealing
- D-ring hangers or French cleat rated for the mirror weight
- Wall fixings appropriate for the wall type (drywall anchors, masonry fixings)
- Spirit level
For mirror glass specifically, residential glass repair and cutting services can supply mirror glass cut to exact dimensions with polished or bevelled edges, which removes the need to cut glass on-site and reduces the risk of breakage during the project.
Measuring and Cutting the Frame Materials
Measure the mirror glass dimensions precisely before cutting any frame material. The rabbet, which is the stepped groove on the back of the frame, must be cut to the actual glass dimension. Not the intended dimension. Glass cut by a professional supplier will arrive at exact dimensions, but confirm with a steel tape rule before cutting.
For mitre-joined frame corners, cut each frame piece with 45-degree mitre cuts at both ends. The inside dimension of each mitre-cut piece must match the corresponding glass dimension exactly. A reliable method is to mark the inside dimension directly from the glass. Hold the glass against the frame stock and mark where the inner shoulder of the rabbet aligns. This eliminates accumulated measuring error from transferring dimensions through a tape rule.
Mark all cuts before cutting any pieces. Lay out the four frame members on a flat surface and check the inside dimensions match the glass before making any saw cuts. An error found at this stage costs nothing. The same error found after cutting and gluing costs a full set of frame material.
If the frame is cut from flat board stock rather than purchased moulding, cut the rabbet depth to the glass thickness plus 2mm. A 4mm mirror in a 6mm rabbet sits slightly proud of the back of the frame. This allows mirror adhesive to be applied without compressing the backing.
Assembling and Securing the Frame
Sand all frame pieces through 80, 120, and 180 grit before assembly. Removing sharp edges and surface marks before the frame is joined makes finishing significantly easier than sanding around assembled joints. Pay particular attention to the inside edge of the rabbet, where any roughness will contact the mirror backing.
Apply wood glue to each mitre joint and assemble all four corners simultaneously using corner clamps. Check the assembly is square by measuring diagonals. Equal diagonals confirm a square frame. Allow the glue to cure fully before removing clamps, typically two hours for PVA wood glue at room temperature.
Reinforce each mitre joint with two countersunk brads driven from the face of the frame. Angle them slightly toward the corner. These prevent the joint from opening over time as the timber expands and contracts with seasonal humidity changes. Fill nail holes with wood filler, allow to dry, and sand flush with 180 grit. Advanced Window & Glass Repair can supply replacement mirror glass to the exact rabbet dimensions for any frame built to this specification.
Apply primer, then paint or stain according to the intended finish. Two coats of paint with a light sand between coats produces a more durable surface than a single heavy coat. Allow the final coat to dry fully before installing the mirror glass.
Mounting and Hanging the Mirror Safely
Apply mirror adhesive to the back of the frame rabbet in dots approximately 50mm apart around the perimeter. Do not apply adhesive in a continuous bead, as this traps moisture against the mirror backing and causes edge corrosion. Lower the mirror glass into the rabbet and press gently against the adhesive. Place the mirror face-down on a flat padded surface while the adhesive cures.
Mirror clips are an alternative to adhesive and allow the glass to be removed later. Clips fix to the back of the frame and grip the edge of the glass without adhesive contact. They are preferable for mirrors that may need replacement glass in the future. For bathroom applications where adhesive may deteriorate, clips are the better choice.
Calculate the wall fixing load before hanging. A 6mm mirror at 600mm by 900mm weighs approximately 7 to 8 kilograms. A timber frame of this size adds 2 to 4 kilograms. Total hanging load is approximately 10 to 12 kilograms. Use D-ring hangers rated to at least twice the calculated load. Fix into wall studs where possible. For drywall without stud access, use plasterboard anchors rated for the load.
Mark the hanging position with a pencil and use a spirit level to set the fixing points. Test that the mirror is stable and level before the installation is complete. A mirror that swings or rocks on its fixings needs additional support or a different hanging method. Advanced Window & Glass Repair can advise on glass weight and fixing loads for any custom mirror project across Northern Virginia, DC, and Maryland.
For custom mirror glass cut to exact dimensions with polished or bevelled edges across Northern Virginia, DC, and Maryland, call us or visit the contact page to request a quote.
Frame Style Ideas by Room Type
The frame finish and profile should relate to the materials already present in the room. In a bathroom with white ceramic tile and chrome fixtures, a thin white-painted or polished chrome frame reads as intentional and clean. A heavy ornate timber frame in the same bathroom would look out of place regardless of how well it is built.
For living rooms and dining rooms with traditional timber furniture and skirting, a wider hardwood frame works well. Match the stain or paint colour to the existing trim. A flat profile in a paint colour that contrasts with the wall makes the mirror a deliberate feature rather than a functional afterthought.
In hallways, a tall narrow mirror with a slim frame maximises the sense of space. The frame colour can match the door architraves to tie the mirror into the existing trim language of the space.
For bedrooms with a wall-mounted mirror above a dresser or chest of drawers, the frame width and profile should relate to the furniture scale. A mirror with a frame of similar width and detail to the drawer fronts reads as a matched set rather than a separate purchase.
Safety is a consideration for large mirrors and mirrors installed in locations where breakage could cause injury. Building codes in the U.S. require safety glazing in hazardous locations including mirrors adjacent to bathtub and shower enclosures. The U.S. Consumer Product Safety Commission safety glazing standard defines which locations require safety-rated glass, including tempered or laminated glazing. For mirrors in bathrooms or near floor level in any room, confirm whether safety glass is required before ordering the mirror glass.
Conclusion
A DIY framed mirror is a practical project that can be completed over a weekend with basic tools and the right materials. The quality of the result depends on accurate measuring before cutting, proper frame assembly, and correct mirror glass specification for the intended location.
For mirror glass cut to exact dimensions with polished edges, a professional glass supplier removes the risk of on-site cutting. The result is cleaner than most DIY cuts. Advanced Window & Glass Repair supplies custom mirror glass across Northern Virginia, DC, and Maryland. The team advises on thickness, edge finish, and whether safety glass applies to the installation location. For ideas on how cut glass can be used in other home projects beyond mirrors, the creative uses for old glass table tops guide covers a range of custom glass applications worth considering.
Advanced Window & Glass Repair provides custom cut mirror glass, glass table tops, and glass cutting services across Northern Virginia, DC, and Maryland. Visit the contact page to request a quote or discuss your project.
Frequently Asked Questions
What thickness of mirror glass should I use for a DIY framed mirror?
Use 4mm mirror glass for mirrors up to approximately 600mm by 900mm. For larger mirrors, use 6mm glass, which resists flexing and distortion when hung. Very large mirrors above 1200mm in either dimension should use 6mm glass as a minimum and may benefit from additional frame support at the back to distribute the hanging load evenly. Confirm the glass thickness with the supplier when ordering so the frame rabbet depth is cut to match.
What is the best adhesive for attaching mirror glass to a frame?
Use mirror-specific adhesive rather than standard construction adhesive. Standard adhesives contain solvents that attack the mirror backing, causing the backing to delaminate and the silver layer to fail over time. Mirror mastic is the common product used by glaziers and is available from glass suppliers. Apply in dots rather than a continuous bead to allow moisture to escape from behind the glass and prevent edge corrosion.
Do I need safety glass for a bathroom mirror?
U.S. building codes require safety glazing for mirrors adjacent to bathtub and shower enclosures, as these are classified as hazardous locations where broken glass could cause serious injury. Safety glazing means either tempered glass or laminated glass. Standard mirror glass is not safety-rated. If the mirror will be installed within the enclosure area or immediately adjacent to it, confirm with a glazier whether safety glass is required for the specific location before ordering.
How do I prevent the black edge corrosion that appears around bathroom mirrors?
Black edge corrosion is caused by moisture reaching the silver or aluminium backing at the glass edge. Prevent it by sealing the edges of the mirror glass with clear silicone sealant after installation, and by using mirror clips or a ventilated backing system rather than full-coverage adhesive. Low-copper mirror glass is more resistant to backing failure in humid environments and is worth specifying for mirrors that will be exposed to shower steam or condensation regularly.
Can I cut mirror glass myself for a DIY project?
Mirror glass can be scored and broken with a glass cutter, but it is significantly harder to cut cleanly than plain float glass because the backing coating changes how the score propagates. Irregular cuts or snapped edges are common without practice and the right technique. For mirror glass that needs to be cut to exact dimensions or with polished or bevelled edges, professional glass cutting produces a better result and eliminates the risk of breakage during the project.